
Add or Reinstall the ‘Microsoft Print to PDF’ on Windows
Have you ever tried to save a document as a PDF on your Windows computer but couldn’t find the Microsoft Print to PDF option? This can be frustrating, especially when you need to save a Word document, webpage, spreadsheet, or image as a PDF without installing extra software.
Microsoft Print to PDF is a Windows printing feature that lets you create PDF files from almost any application that supports printing. Instead of sending a document to a physical printer, you select this virtual printer and save the output as a PDF file.
Sometimes, this option may disappear from the printer list, stop working, or show an error when you try to use it. The feature may have been disabled, removed accidentally, or affected by a Windows configuration problem.
In this guide, you’ll learn how to add or reinstall Microsoft Print to PDF on Windows 10 and Windows 11 using simple steps.
Add or Reinstall ‘Microsoft Print to PDF’ on Windows
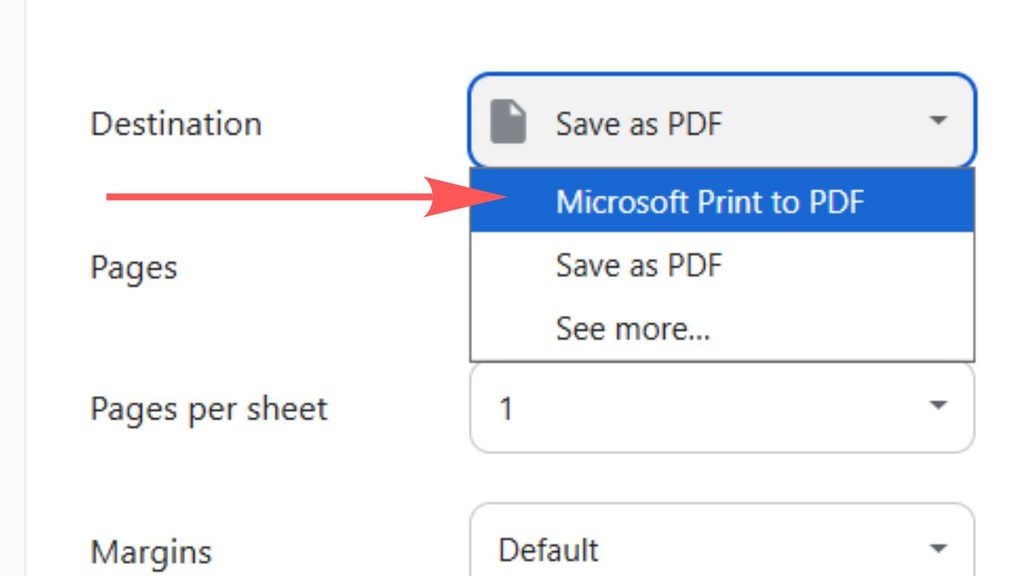
To add or reinstall Microsoft Print to PDF, open Windows Features and enable Microsoft Print to PDF. If it is already enabled but missing, disable and re-enable it, add the printer manually through Settings, or use PowerShell to restore the feature.
Before trying the advanced methods, restart your computer and check whether Microsoft Print to PDF appears in your printer list.
If it is still missing, follow the steps below in order.
Step 1: Enable Microsoft Print to PDF in Windows Features
One of the easiest ways to restore Microsoft Print to PDF is to check whether its Windows feature is disabled. Windows lets you turn certain optional features on or off, and this printer may be unavailable if its feature has been turned off.
Press Windows + R on your keyboard to open the Run dialog box. Type optionalfeatures.exe and press Enter.
The Windows Features window will appear. Look through the list for Microsoft Print to PDF.
If the checkbox is empty, select it to enable the feature. Click OK and allow Windows to apply the change. You may need to wait a few moments while Windows configures the required components.
If Windows asks you to restart your computer, save your work and restart.
After Windows loads, open Settings > Bluetooth & devices > Printers & scanners in Windows 11. In Windows 10, open Settings > Devices > Printers & scanners.
Check whether Microsoft Print to PDF appears in the printer list. If you can see it, try printing a document to PDF to confirm that it works.
If the feature was already enabled or the printer is still missing, continue to the next step.
Step 2: Disable and Re-Enable Microsoft Print to PDF
Sometimes, the feature appears to be enabled in Windows Features but does not work correctly. Turning it off and enabling it again can refresh the Windows component and resolve minor configuration problems.
Open the Run dialog box by pressing Windows + R. Type optionalfeatures.exe and press Enter.
Find Microsoft Print to PDF in the Windows Features list. If it is checked, clear the checkbox and click OK.
Wait for Windows to finish applying the change. Restart your computer if Windows requests it.
After restarting, open Windows Features again using the same command. Find Microsoft Print to PDF, select its checkbox, and click OK.
Allow Windows to complete the installation. Restart your computer again if prompted.
Now open the Printers & scanners settings page and check whether the printer has returned.
If the option is still missing, don’t worry. You can try adding the printer manually.
Step 3: Add Microsoft Print to PDF Manually
If Microsoft Print to PDF does not appear automatically, you can try adding it through the Windows printer setup wizard.
Open Settings by pressing Windows + I. Navigate to Bluetooth & devices > Printers & scanners in Windows 11 or Devices > Printers & scanners in Windows 10.
Select Add device or Add a printer or scanner, depending on your Windows version. Allow Windows a moment to search for available printers.
If Microsoft Print to PDF does not appear, look for the option to add a printer manually. In Windows 11, you may need to expand the available options or select the link for adding a new device manually.
Choose the option to add a local printer or network printer using manual settings, if available.
When prompted to choose a printer port, select Use an existing port and look for PORTPROMPT: (Local Port). The available options can vary by Windows version.
Next, open the manufacturer list and select Microsoft. Look for Microsoft Print To PDF in the printer models list.
If it appears, select it and follow the wizard to complete the installation. If Windows asks whether to use an existing driver or replace it, choose the recommended option for your situation.
Once the process finishes, return to Printers & scanners and check whether the printer is available.
If Microsoft Print to PDF is missing from the driver list, move on to the next method.
Step 4: Restore Microsoft Print to PDF Using PowerShell
If Windows Features and the manual installation wizard do not resolve the problem, you can try restoring the feature through PowerShell.
This method requires administrator access, so follow the instructions carefully.
Open the Start menu and search for Windows PowerShell or Terminal. Right-click the result and select Run as administrator. Approve the User Account Control prompt if it appears.
Enter the following command and press Enter:
Enable-WindowsOptionalFeature -Online -FeatureName Printing-PrintToPDFServices-Features -All
This command attempts to enable the Microsoft Print to PDF Windows feature for your current Windows installation.
Wait for the command to finish. If Windows asks whether to restart the computer, save your work and follow the prompt.
If the command reports that the feature name is unknown or unavailable, do not keep trying random feature names. The feature name or availability may differ with the Windows installation, so check the installed feature information before proceeding.
After the operation completes, restart your PC if necessary. Open Settings > Printers & scanners and check whether Microsoft Print to PDF is available.
If the command succeeds but the printer still does not appear, continue with the next step.
Step 5: Check the Print Spooler Service
The Print Spooler is a Windows service that manages printing tasks. If it is stopped or experiencing problems, printers may not work as expected.
Press Windows + R, type services.msc, and press Enter.
The Services window will open. Scroll down until you find Print Spooler.
Double-click it to open its properties. Check the service status. If it is stopped, click Start. If it is already running, select Restart if that option is available.
Make sure the startup type has not been unnecessarily disabled. For a typical Windows installation, the Print Spooler should be able to start when printing is needed.
Click Apply if you changed a setting, then select OK.
Close the Services window and open your printer settings again. Try printing a document using Microsoft Print to PDF.
If the printer is still unavailable, proceed to the next step.
Step 6: Repair Windows System Files
Damaged Windows system files can sometimes interfere with optional features and printing components. Windows includes tools that can scan for and repair certain system file problems.
Open the Start menu and search for Command Prompt. Right-click it and choose Run as administrator.
Enter this command and press Enter:
sfc /scannow
Wait until the scan reaches 100%. This can take several minutes, so leave the Command Prompt window open.
If Windows reports that it found and repaired corrupted files, restart your computer and check Microsoft Print to PDF again.
If the problem continues, run the following command in the same administrator Command Prompt window:
DISM /Online /Cleanup-Image /RestoreHealth
Press Enter and allow the process to finish. Keep your internet connection active because DISM may need to obtain repair files from Windows Update.
After DISM completes, run sfc /scannow again, then restart your computer.
Check whether Microsoft Print to PDF is available. If it still doesn’t work, the issue may require further Windows troubleshooting.
Step 7: Test Microsoft Print to PDF
Once the printer has been restored, test it to make sure it can create PDF files correctly.
Open a document in Notepad, Microsoft Word, or another application that supports printing. Press Ctrl + P to open the print dialog.
Select Microsoft Print to PDF from the printer list. Click Print.
Windows should open a Save Print Output As dialog box. Choose a location, such as your Desktop or Documents folder, and enter a filename.
Click Save.
Navigate to the folder where you saved the file and open the PDF. Check that the document displays correctly.
If the printer appears but the PDF is not created, check whether the destination folder is writable and whether the application displays an error. You can also try printing from another application to determine whether the problem is limited to a particular program.
FAQs
1. Why is Microsoft Print to PDF missing from Windows 11?
The feature may be disabled, its printer entry may have been removed, or a Windows configuration issue may be preventing it from appearing. Check Windows Features first, then try adding the printer manually.
2. Is Microsoft Print to PDF available on Windows 10?
Yes. Microsoft Print to PDF is available on supported Windows 10 installations, as well as Windows 11. You generally do not need to download a separate installer.
3. Can I download Microsoft Print to PDF separately?
You normally do not need to download it separately. It is a Windows feature. Enable it through Windows Features or restore it using the appropriate Windows tools rather than downloading drivers from unknown websites.
4. Does reinstalling Microsoft Print to PDF delete my files?
No. Enabling or reinstalling the virtual printer should not delete your personal files. However, always save your work before restarting your computer or making system changes.
5. What should I do if Microsoft Print to PDF still doesn’t work?
Check the Print Spooler service, repair Windows system files with SFC and DISM, and review any error messages. If the problem persists, investigate whether Windows optional components or the printer configuration are damaged.
Summary
Microsoft Print to PDF is a useful Windows feature that lets you create PDF files without a physical printer or separate PDF software.
If it disappears or stops working, start by enabling it through Windows Features. If that doesn’t help, disable and re-enable the feature, add the printer manually, or use PowerShell to restore it.
You can also check the Print Spooler service and repair corrupted Windows system files using SFC and DISM. After restoring the printer, test it by printing a document and saving the output as a PDF.
Following these steps should help you restore Microsoft Print to PDF on Windows 10 or Windows 11 without performing a full Windows reinstall.