
Connect Your Canon Maxify Wireless Printer to Your Computer
A Canon MAXIFY wireless printer helps print documents from your computer without connecting a USB cable every time. Once the printer is connected to your Wi-Fi network and added to your computer, you can print from applications such as Word, Excel, and your web browser.
The setup process is slightly different on Windows and Mac, but the basic idea is the same. Your printer and computer must be connected to the same wireless network. Canon also provides model-specific setup software and drivers, so the exact menu names may vary depending on your MAXIFY model.
This guide explains how to connect your printer from the beginning, even if you have never installed a wireless printer before.
Quick Steps
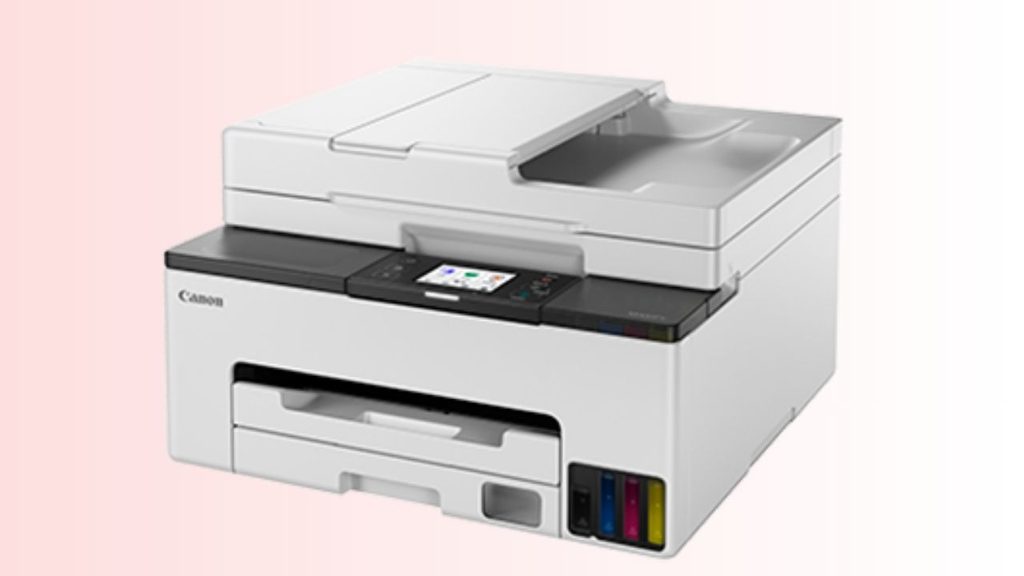
To connect your Canon MAXIFY wireless printer to a Windows PC or Mac, first connect the printer to your Wi-Fi network. Next, download the correct Canon setup software or printer driver for your model, run the installation, and select the wireless connection option. Follow the on-screen instructions to add the printer. Finally, print a test page to confirm that the connection is working.
Note: Your computer and printer must be connected to the same wireless network for wireless printing to work.
Now, let’s learn in detail!
How to Connect Your Canon MAXIFY Wireless Printer to Windows
Step 1: Check Your Printer and Wi-Fi Network
Start by placing your printer reasonably close to your wireless router. Turn on the printer and wait until it finishes starting up. If your printer has a touchscreen, look for the Wi-Fi or Wireless LAN settings.
Your Windows computer should already be connected to the Wi-Fi network you want to use. If your computer is connected to a different network, the printer may not appear during setup.
If your printer has never been connected to Wi-Fi, you will need to start its wireless setup process. If it was previously connected to another router, you may need to reconnect it to your current network.
Step 2: Open Canon’s Official Support Page
Open your web browser and visit the Canon Support website. Search for your exact printer model, such as MAXIFY MB2720, MAXIFY MB5020, or MAXIFY GX2020.
Select your printer from the search results. On the printer’s support page, choose your operating system, such as Windows 11 or Windows 10, if the website asks you to do so.
Look for the Drivers & Downloads or Software & Drivers section. Download the recommended setup software for your printer. Avoid downloading drivers from unknown websites because the wrong software may not support your model.
Step 3: Start the Canon Wireless Setup
After the download finishes, open the downloaded setup file. You may find it in your browser’s Downloads folder. Double-click the file to start the installation.
If Windows asks whether you want to allow the program to make changes to your computer, select Yes. The Canon setup window should then open.
Follow the introductory instructions until you reach the Connection Method or Connection Method Selection screen. Select Wireless Connection if that option is available. This tells the installer that you want to use the printer through Wi-Fi rather than a USB cable.
Step 4: Put Your Printer Into Wireless Setup Mode
If the installer asks you to prepare the printer, use the printer’s control panel to start wireless setup.
On some MAXIFY models, the process is similar to this: open LAN settings, select Wi-Fi, choose Wi-Fi setup, and then select Easy wireless connect. Confirm the selection when prompted.
The exact menu names may differ between MAXIFY models, so follow the instructions shown for your particular printer. Canon’s wireless setup instructions explain that the printer should be placed into Easy Wireless Connect mode before completing setup on the computer.
Step 5: Select Your Wi-Fi Network
Return to the Windows setup window. The installer may search for available wireless networks or ask you to select your network manually.
Choose the same Wi-Fi network that your computer is using. If you see several networks, check the network name carefully before selecting one.
When prompted, enter your Wi-Fi password. Type it exactly as it appears, including uppercase letters, lowercase letters, and numbers. If the password is incorrect, the printer will not be able to connect.
Step 6: Allow the Installer to Add the Printer
Once the printer connects to your wireless network, the Canon installer should detect it. Select the printer when it appears, then continue through the setup screens.
The installer may download and install the printer driver and other required software. This can take several minutes, so avoid turning off the printer or closing the setup window while the installation is running.
If the installer asks you to agree to a license agreement, read the agreement and select Agree or Yes to continue. Canon’s setup process includes these confirmation steps before the driver installation begins.
Step 7: Finish the Installation and Print a Test Page
When the installation is complete, select Next, Finish, or the appropriate button shown by the installer.
Now open Settings in Windows. Select Bluetooth & devices, then choose Printers & scanners. On Windows 10, the path is Settings > Devices > Printers & scanners.
Look for your Canon MAXIFY printer in the list. If it appears, select it and check that it is available. You can then open a document, select Print, choose your Canon printer, and print a test page.
If the test page prints successfully, your printer is ready to use.
How to Connect Your Canon MAXIFY Wireless Printer to Mac
Step 1: Connect Your Mac to the Correct Wi-Fi Network
Before installing the printer, connect your Mac to the Wi-Fi network you want to use. Click the Wi-Fi icon in the menu bar and select your network.
Make sure the printer is turned on and connected to the same wireless network. If the printer has not been connected before, you will need to complete its wireless setup first.
Step 2: Download the Correct Mac Setup Software
Open your browser and visit the Canon Support website. Search for your exact MAXIFY printer model and open its support page.
Select macOS or the appropriate Mac operating system version if the website asks you to choose one. Then open the Drivers & Downloads section.
Download the recommended printer driver or setup software for your printer. The available software depends on your model and the version of macOS installed on your Mac.
Step 3: Open the Downloaded Installer
After the download finishes, open the downloaded file from your Downloads folder. Double-click it to start the installation.
If macOS asks for permission to open the installer, follow the on-screen instructions. You may need to enter your Mac administrator password before the installation can continue.
Follow the introductory instructions until you reach the connection method screen. Select Wireless Connection when that option is available. Canon’s wireless setup instructions use this option to configure the printer through Wi-Fi.
Step 4: Start Wireless Setup on the Printer
If the installer asks you to prepare the printer, open the printer’s LAN settings or Wi-Fi setup menu.
On some MAXIFY models, you can select Wi-Fi setup, followed by Easy wireless connect, and then confirm the selection. The exact steps vary by model, so use the instructions displayed for your printer.
Once the printer enters wireless setup mode, return to the Mac installer and continue.
Step 5: Select Your Network and Enter the Password
The installer may search for nearby wireless networks. Select the network that your Mac is connected to.
Enter the Wi-Fi password when prompted. Make sure the password is correct because even a small typing mistake can prevent the printer from connecting.
Wait while the printer connects to the network. Do not close the installer during this process.
Step 6: Add the Printer to Your Mac
After the printer connects successfully, the Canon installer should detect it. Select your printer and continue with the installation.
The installer may download and install the required driver. Wait until the process finishes. Some Canon models also offer additional software for scanning or printer management, but you can usually choose whether to install optional software.
Step 7: Print a Test Page
When the installation is complete, open System Settings on your Mac. Select Printers & Scanners.
If you are using an older version of macOS, you may find the option under System Preferences > Printers & Scanners.
Look for your Canon MAXIFY printer in the list. If it appears, select it and try printing a document. You can also open an application such as TextEdit, create a short document, and select File > Print.
Choose your Canon MAXIFY printer and click Print. If the document prints successfully, your wireless printer is connected and ready to use.
Common Problems When Connecting a Canon MAXIFY Printer
The Printer Does Not Appear During Setup
If your printer does not appear, first check that both the computer and printer are connected to the same Wi-Fi network. If the printer is connected to another network, repeat the wireless setup process.
You can also restart the printer and your router, then try the setup again. Canon notes that a firewall or VPN can sometimes interfere with printer detection during setup. If necessary, temporarily disconnect from a VPN and check whether your firewall is blocking the setup process.
The Printer Connects but Will Not Print
If the printer appears in Windows or Mac but does not print, check whether it is set as the default printer. Also, make sure there are no documents stuck in the print queue.
Try printing a test page from the printer settings. If the test page works, the problem may be with the application or document you are trying to print.
The Printer Keeps Disconnecting
If your printer frequently disconnects, check the strength of your Wi-Fi signal. Moving the printer closer to the router may help.
You should also check whether your router is working properly and whether other devices can connect to the same network. If the issue continues, restart the printer and reconnect it to Wi-Fi.
FAQs
Can I connect my Canon MAXIFY printer without a USB cable?
Yes. If your printer supports wireless networking, you can connect it to your computer through Wi-Fi. You do not need to keep a USB cable connected for normal wireless printing.
Do my computer and printer need to be on the same Wi-Fi network?
Yes. For wireless printing through your local network, the computer and printer must be connected to the same wireless network.
Can I connect the printer to both Windows and Mac?
Yes. You can install the appropriate Canon driver and setup software on each computer. Each computer must be connected to the same wireless network as the printer.
What should I do if I do not know my Wi-Fi password?
You can usually find the password on your router’s label or in your router’s settings. If you cannot find it, contact the person who manages your Wi-Fi network.
Do I need to install a driver on a Mac?
Depending on your Canon MAXIFY model and macOS version, you may need the appropriate Canon printer driver or setup software. Canon provides model-specific software and compatibility information on its support pages.
Can I use the printer if it is connected to a different Wi-Fi network?
No. If your printer is connected to another network, your computer may not be able to find it. You should reconnect the printer to the same Wi-Fi network as your computer.
Summary
Connecting your Canon MAXIFY wireless printer to a computer involves three main tasks: connecting the printer to your Wi-Fi network, installing the correct Canon software, and adding the printer to Windows or macOS.
For Windows, open Canon’s support page, download the appropriate setup software, select Wireless Connection, connect the printer to your Wi-Fi network, and then add it through Printers & scanners.
For Mac, download the appropriate Canon software for your MAXIFY model and macOS version, select Wireless Connection, connect the printer to your Wi-Fi network, and add it through Printers & Scanners in System Settings.
Once the printer appears on your computer and successfully prints a test document, the setup is complete.