
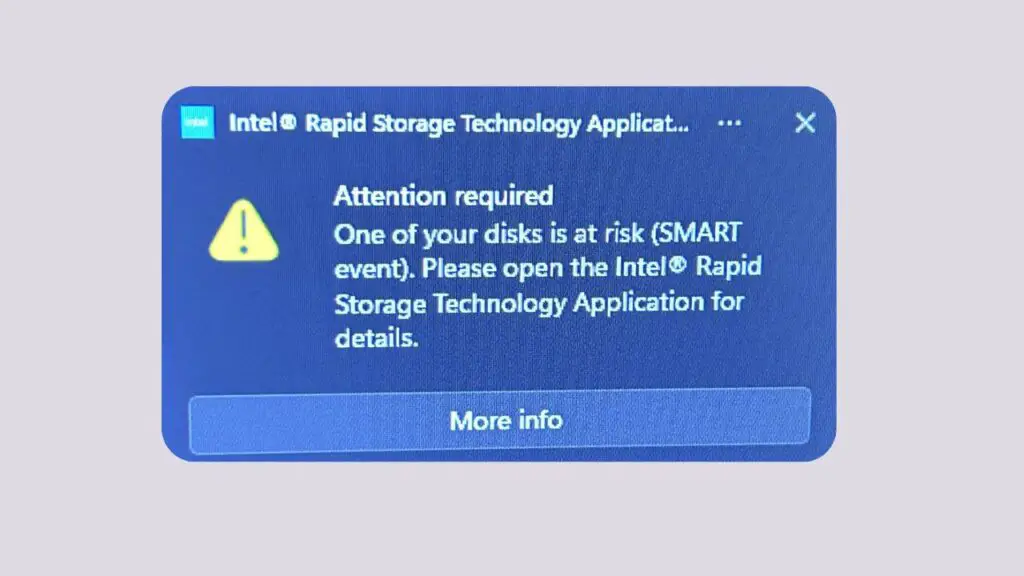
Fix ‘One of your disks is at risk (smart event)’ on Windows 11
Seeing the message “One of your disks is at risk (SMART event)” on your Windows 11 PC can be alarming, especially if you are not familiar with hardware-related warnings. This message usually appears when your computer detects potential problems with a storage drive, such as a hard disk drive (HDD) or solid-state drive (SSD).
The warning is generated by SMART (Self-Monitoring, Analysis, and Reporting Technology), a built-in monitoring system designed to detect early signs of drive failure. When SMART reports an issue, it means the drive may be experiencing hardware problems that could eventually lead to data loss.
In this guide, you will learn how to diagnose the problem, protect your files, and fix the “One of your disks is at risk (SMART event)” error on Windows 11.
Fix “One of Your Disks Is at Risk (SMART Event)” on Windows 11
The “One of your disks is at risk (SMART event)” error on Windows 11 appears when SMART technology detects potential issues with your HDD or SSD. To fix it, first back up important files, check the drive’s health status, run the CHKDSK utility, inspect physical connections, update drive firmware, and review SMART diagnostics. If the drive continues reporting SMART errors, replacing the storage device is the safest solution to prevent data loss.
SMART warnings are designed to provide advanced notice before a storage device completely fails. While some warnings can be caused by minor issues, many indicate that the drive is approaching the end of its lifespan. Taking immediate action can help you save important data and avoid unexpected system crashes.
Step 1: Back Up Your Important Files Immediately
The very first thing you should do is create a backup of your important files.
When a SMART warning appears, your drive may still be functioning normally, but there is no guarantee it will continue working. Hardware failures can occur suddenly, and waiting too long could result in permanent data loss.
Open File Explorer and copy your important documents, photos, videos, and work files to an external hard drive, USB flash drive, or cloud storage service. Focus on irreplaceable data first, such as family photos, personal documents, project files, and business records.
If your computer contains a large amount of data, consider creating a complete system backup using Windows Backup or third-party backup software. This ensures you can restore everything if the drive eventually fails.
Think of the SMART warning as an early warning signal. Your data should become the top priority before attempting any troubleshooting steps.
Step 2: Check the Drive’s Health Status
After securing your files, the next step is checking the health of the affected drive.
Windows 11 includes a built-in storage health monitoring feature. To access it, open Settings, select System, click Storage, choose Advanced storage settings, and then open Disks & Volumes.
Select the affected drive and review any available health information.
You can also use Windows PowerShell for a quick health check. Right-click the Start button and choose Terminal (Admin). Then enter the following command:
wmic diskdrive get status
After running the command, Windows will display the health status of detected drives.
If you see OK, the drive is currently reporting normal health. If you receive warnings such as Pred Fail, Caution, or other abnormal results, the drive may be experiencing hardware-related issues.
Keep in mind that this basic check does not provide detailed SMART information, but it helps determine whether further investigation is necessary.
Step 3: Run the CHKDSK Utility
File system corruption and bad sectors can sometimes trigger disk-related warnings. Running the CHKDSK utility allows Windows to scan and repair logical drive errors.
Open Command Prompt as Administrator and enter:
chkdsk C: /f /r
Replace C: with the drive letter of the affected disk if necessary.
The /f parameter tells Windows to fix detected errors, while /r searches for bad sectors and attempts to recover readable data.
If the drive being scanned is currently in use, Windows will ask whether you want to schedule the scan during the next restart. Type Y and restart your computer.
The scanning process may take some time, especially on larger drives. Once completed, review the results carefully. If CHKDSK repairs errors successfully, monitor the drive to see whether the SMART warning returns.
While CHKDSK can resolve file system issues, it cannot permanently repair physical hardware damage. If bad sectors continue increasing, the drive may fail.
Step 4: Use Windows Error Checking Tool
Windows 11 provides a graphical disk scanning tool that is easy for beginners to use.
Open File Explorer and click This PC. Right-click the affected drive and select Properties. Navigate to the Tools tab and click Check under the Error Checking section.
Windows will examine the drive for problems and attempt to fix any detected file system issues.
This method performs a similar function to CHKDSK but uses a more user-friendly interface. New users often find this approach easier because it does not require entering commands.
After the scan finishes, restart your computer and verify whether the SMART warning still appears.
Step 5: Review SMART Information Using Diagnostic Software
To understand exactly why SMART generated a warning, you should examine the detailed SMART attributes.
Several drive diagnostic tools can display advanced SMART data, including temperature, reallocated sectors, pending sectors, and read error rates.
Install a trusted disk monitoring utility and review the SMART status of your storage device.
Pay close attention to values such as Reallocated Sector Count, Current Pending Sector Count, and Uncorrectable Sector Count.
If these values are increasing over time, the drive is likely deteriorating physically.
For SSDs, check indicators such as Percentage Used, Wear Leveling Count, and Remaining Life. SSDs have a limited number of write cycles, and SMART warnings can indicate excessive wear.
Understanding these metrics helps determine whether the problem is temporary or whether drive replacement is necessary.
Step 6: Check Physical Drive Connections
Loose or damaged cables can sometimes cause communication problems between the motherboard and storage drive.
If you are using a desktop PC, shut down the computer completely and disconnect the power cable. Open the case and inspect the SATA data cable and power cable connected to the storage drive.
Make sure all connections are firmly seated.
If possible, try connecting the drive to a different SATA port or using a different SATA cable.
Laptop users generally have less access to internal components, but if you are comfortable opening the laptop and your warranty allows it, inspect the storage drive connection carefully.
After reconnecting everything, restart the system and monitor whether the SMART warning persists.
Step 7: Update SSD Firmware or Storage Drivers
Storage manufacturers occasionally release firmware updates that improve drive stability and fix known issues.
Visit the manufacturer’s support website and download the latest firmware tool for your SSD or HDD model.
Before performing any firmware update, ensure your data is backed up. Although firmware updates are generally safe, unexpected interruptions can cause complications.
You should also update storage controller drivers through Device Manager.
Right-click the Start button, select Device Manager, expand Disk Drives and Storage Controllers, then check for driver updates.
Updated firmware and drivers can resolve compatibility issues that may contribute to SMART-related alerts.
Step 8: Run Manufacturer Diagnostic Tools
Most storage manufacturers provide official diagnostic utilities designed specifically for their drives.
These tools can perform advanced health checks that go beyond standard Windows diagnostics.
Launch the manufacturer’s utility and run both quick and extended diagnostic tests.
The software may identify failing memory cells, excessive bad sectors, controller problems, or other hardware issues.
If the utility reports a failed test, the drive is likely experiencing a genuine hardware failure.
At this stage, replacing the drive should become a priority.
Step 9: Monitor Drive Temperature
Excessive heat can negatively affect drive performance and lifespan.
Many SMART warnings include temperature-related data. If your drive is operating above recommended temperatures, long-term damage may occur.
Check drive temperatures using a hardware monitoring tool.
For most SSDs, temperatures below 70°C are generally acceptable, while HDDs usually perform best below 60°C.
If temperatures are consistently high, improve airflow inside the computer, clean dust from cooling fans, and ensure ventilation openings are not blocked.
Reducing heat can improve reliability and help prevent further storage issues.
Step 10: Replace the Drive if SMART Errors Continue
If SMART warnings persist after performing all troubleshooting steps, replacing the drive is the safest solution.
SMART technology is specifically designed to predict hardware failure before catastrophic data loss occurs. Continuing to use a drive that repeatedly generates SMART warnings can be risky.
Purchase a replacement SSD or HDD that meets your storage requirements.
Clone the existing drive if it remains functional, or restore data from your backup after installing the new drive.
Once the replacement is installed, reinstall Windows if necessary and transfer your files back to the system.
Although replacing a drive requires some effort, it is far less stressful than losing valuable data unexpectedly.
FAQs
What does SMART event mean on Windows 11?
A SMART event means your storage drive has reported signs of potential failure through its built-in health monitoring system. The warning indicates that the drive should be inspected as soon as possible.
Can I continue using my PC after a SMART warning?
Yes, in many cases, the computer will continue functioning normally. However, you should immediately back up important files because the drive may fail without further warning.
Does CHKDSK fix SMART errors?
CHKDSK can repair file system problems and locate bad sectors, but it cannot permanently repair physical hardware damage within a failing drive.
Can SSDs show SMART warnings?
Yes. SSDs support SMART monitoring just like traditional hard drives. SMART warnings on SSDs often relate to wear levels, memory cell degradation, or controller issues.
Is the SMART warning always accurate?
SMART technology is highly reliable, but no monitoring system is perfect. Occasionally, firmware bugs or temporary issues may trigger warnings. Nevertheless, all SMART alerts should be taken seriously.
How do I know which disk is failing?
Disk diagnostic software and manufacturer utilities can identify the specific drive reporting SMART problems. These tools display health information for each connected storage device.
Should I replace my drive immediately?
If diagnostic tools confirm hardware deterioration or failed tests, replacing the drive as soon as possible is strongly recommended.
Summary
The “One of your disks is at risk (SMART event)” warning in Windows 11 should never be ignored. It is a signal that your HDD or SSD may be experiencing health issues that could eventually lead to failure and data loss.
Start by backing up your files, then check drive health, run CHKDSK, perform error checking scans, inspect SMART data, verify physical connections, update firmware, and use manufacturer diagnostic tools. Monitoring temperature and overall drive condition can also help identify underlying problems.
If SMART warnings continue despite troubleshooting, replacing the storage drive is the most reliable long-term solution. Acting quickly not only protects your data but also helps prevent unexpected downtime and system instability.