
Fix ‘Windows Installer Service Could Not Be Accessed’ Error
If you see the message “Windows Installer Service Could Not Be Accessed” while trying to install, update, or remove a program, don’t worry. This is a common Windows problem that usually occurs when the Windows Installer service is disabled, corrupted, or unable to start properly. Since many applications rely on this service to install or uninstall correctly, the error can prevent you from adding new software or removing programs you no longer need.
Windows includes several tools that can help restore the Windows Installer service and repair damaged system files. Even if you have never fixed a Windows error before, you can follow the methods below without needing advanced technical knowledge.
This guide explains each solution in a simple way so you can get your system working again.
Fix “Windows Installer Service Could Not Be Accessed” Error
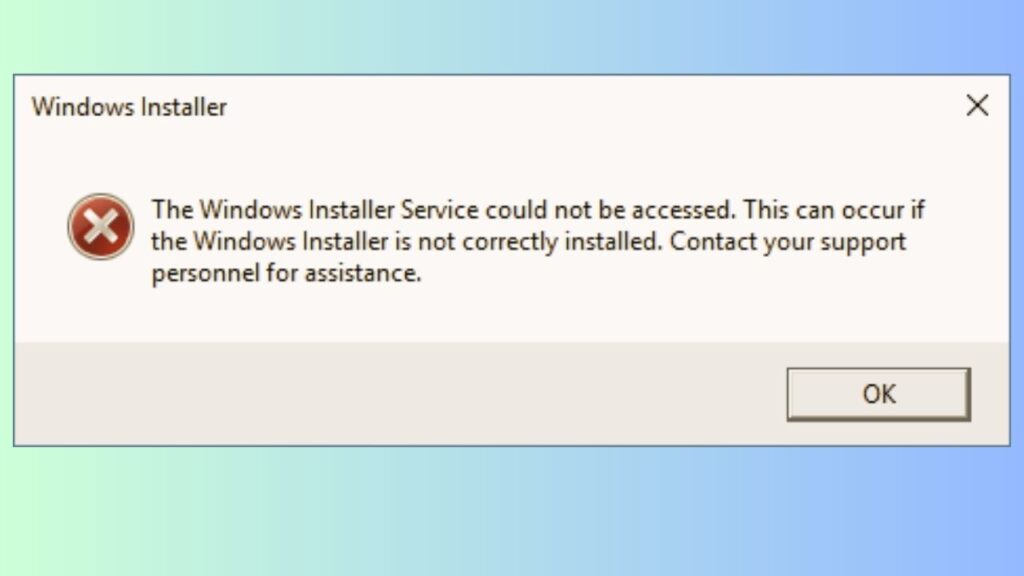
The Windows Installer service, also known as MSIServer, manages software installations that use .MSI installer packages. If this service is disabled, damaged, or fails to start, Windows cannot complete installations correctly and displays the error message.
The issue may appear after a Windows update, malware infection, accidental system changes, damaged registry entries, or corrupted system files.
Fortunately, the following methods resolve the problem in most cases.
Step 1: Restart Your Computer
The first thing you should do is restart your computer. Although this may seem too simple, restarting Windows clears temporary errors, reloads important services, and resolves many installation problems.
Click the Start button, select the Power icon, and choose Restart. Wait for Windows to shut down completely and boot back up.
Once your computer has restarted, try installing or uninstalling the program again. If the error no longer appears, the problem was likely caused by a temporary system issue.
If the error remains, continue with the next solution.
Step 2: Make Sure the Windows Installer Service Is Running
The Windows Installer service must be running for software installations to work correctly.
Press Windows + R to open the Run dialog box. Type services.msc and press Enter.
The Services window will open. Scroll down until you find Windows Installer.
Double-click Windows Installer to open its properties.
If the Service status shows Stopped, click the Start button. If the service is already running, click Stop, wait a few seconds, and then click Start again.
Next, set the Startup type to Manual if it is currently disabled. Click Apply, followed by OK.
Close the Services window and try installing your application again.
Step 3: Re-register the Windows Installer Service
Sometimes the installer service becomes improperly registered, preventing Windows from using it correctly.
Click the Start menu, search for Command Prompt, then choose Run as administrator.
In the elevated Command Prompt window, type the following command and press Enter.
msiexec /unregister
After the command finishes, type the following command and press Enter.
msiexec /regserver
These commands remove the existing registration and register the Windows Installer service again.
Restart your computer after running both commands. Once Windows loads, try installing the software again.
Step 4: Repair Corrupted System Files
Damaged Windows system files can prevent important services from working correctly.
Open Command Prompt as an administrator.
Type the following command and press Enter.
sfc /scannow
The System File Checker will begin scanning your computer.
This process may take several minutes. During the scan, Windows checks protected system files and automatically replaces damaged files with healthy versions.
Do not close the Command Prompt while the scan is running.
When the scan finishes, restart your computer and check whether the installation error has been resolved.
Step 5: Run the DISM Repair Tool
If the System File Checker cannot repair all damaged files, the Deployment Image Servicing and Management tool can repair the Windows image itself.
Open Command Prompt with administrator privileges.
Enter the following command.
DISM /Online /Cleanup-Image /RestoreHealth
Press Enter.
The repair process can take several minutes depending on your computer’s speed and internet connection.
Allow the scan to complete without interruption.
Once finished, restart your PC and attempt the installation again.
Step 6: Check for Windows Updates
An outdated Windows installation may contain bugs that interfere with the installer service.
- Open Settings by pressing Windows + I.
- Select Windows Update.
- Click Check for updates.
If updates are available, download and install all of them.
Some updates include important fixes for Windows services and system components.
Restart your computer after installing the updates and try installing the application once again.
Step 7: Scan Your Computer for Malware
Certain types of malware can disable Windows services, including the Windows Installer service.
Open Windows Security from the Start menu. Select Virus & threat protection. Choose Scan options, then select Full scan.
Start the scan and allow Windows Security to examine every file on your computer. If malware is detected, follow the on-screen instructions to remove it.
After cleaning your computer, restart Windows and test the installer again.
Step 8: Install the Program Using an Administrator Account
Some installers require administrator permissions before they can make changes to your system.
Locate the installation file.
Right-click the installer and choose Run as administrator.
If prompted by User Account Control, click Yes.
This provides the installer with elevated permissions, which often resolves installation problems caused by insufficient privileges.
If you’re using a standard user account, sign in with an administrator account before attempting the installation.
Step 9: Perform a Clean Boot
Background applications or third-party services may interfere with the Windows Installer service.
- Press Windows + R, type msconfig, and press Enter.
- Open the Services tab.
- Enable Hide all Microsoft services.
- Click Disable all.
- Next, switch to the Startup tab and open Task Manager.
- Disable all startup applications.
- Close Task Manager and click OK.
- Restart your computer.
Once Windows starts with only essential services running, try installing the software again.
If the installation succeeds, another application was likely causing the conflict.
Step 10: Create a New User Account
Sometimes the problem exists only within your current Windows user profile.
- Open Settings.
- Go to Accounts, then select Other users.
- Choose Add account and create a new local administrator account.
- Sign out of your current account and sign in using the newly created account.
- Try installing the program again.
If the installation works, your original user profile may be damaged.
FAQs
Why does Windows say the Windows Installer Service could not be accessed?
This error usually appears when the Windows Installer service is disabled, corrupted, improperly registered, or blocked by damaged system files or malware.
Can I safely restart the Windows Installer service?
Yes. Restarting the service is completely safe and is one of the first troubleshooting steps recommended for installation problems.
What is MSIServer?
MSIServer is the official Windows Installer service responsible for installing, modifying, repairing, and uninstalling applications that use MSI installation packages.
Will running SFC and DISM delete my files?
No. Both System File Checker and DISM repair Windows system files without deleting your personal documents, photos, or installed applications.
Can antivirus software cause this error?
In some cases, overly restrictive antivirus software may interfere with software installations. Temporarily disabling third-party antivirus software during installation may help, provided you download software only from trusted sources.
Should I reinstall Windows if nothing works?
Reinstalling Windows should be considered only after trying all the solutions in this guide. Most users resolve the problem by restarting the Windows Installer service, repairing system files, or re-registering the installer.
Summary
The “Windows Installer Service Could Not Be Accessed” error can prevent you from installing, updating, or removing applications, but it is usually fixable without advanced troubleshooting.
In many cases, simply restarting the Windows Installer service or re-registering it restores normal functionality.
If the issue continues, repairing Windows using SFC and DISM, installing the latest Windows updates, scanning for malware, and performing a Clean Boot can resolve deeper system problems.