
How to Access the Router Admin Page: A Complete Guide
Your router admin page is the control panel that lets you manage important network settings. From this page, you can change the Wi-Fi name and password, update security settings, configure parental controls, check connected devices, change DNS settings, update firmware, and troubleshoot certain network problems.
You usually do not need an internet connection to open the router’s admin page. Your computer or phone simply needs to be connected to the router, either through Wi-Fi or an Ethernet cable.
Accessing the page is generally straightforward, but the exact address depends on your router manufacturer and network configuration. Common router addresses include 192.168.1.1, 192.168.0.1, 192.168.1.254, and 10.0.0.1.
The following steps explain how to find the correct address and access the router admin page, even if you are completely new to router settings.
How to Access the Router Admin Page
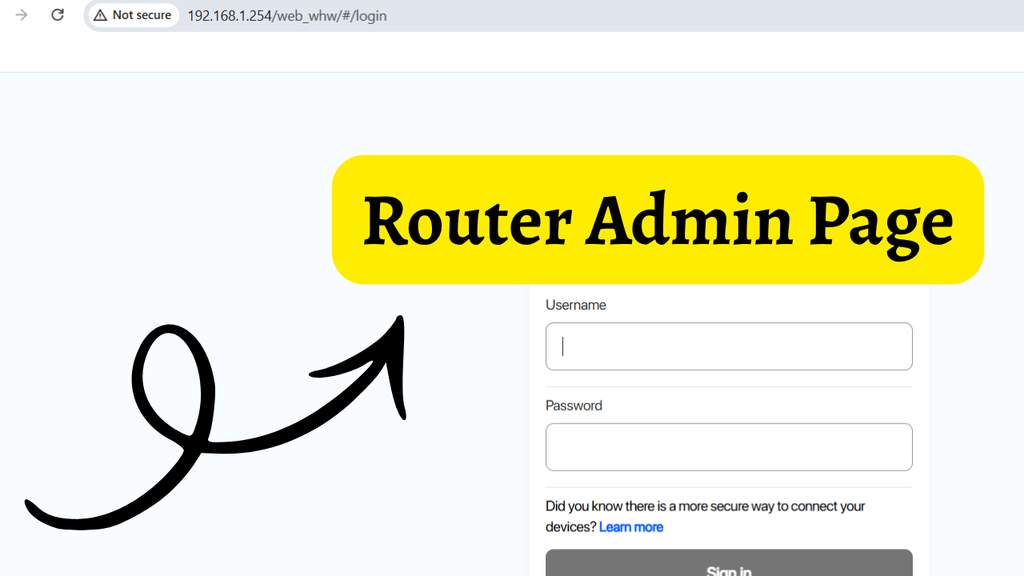
To access your router admin page, connect your computer or phone to the router, open a web browser, and enter the router’s IP address in the address bar. Common addresses include 192.168.1.1, 192.168.0.1, and 10.0.0.1. Press Enter, then enter the router’s administrator username and password when prompted. If you do not know the correct IP address, find the Default Gateway on Windows or the router details on your phone.
Let’s explore the steps in detail!
Step 1: Connect Your Device to the Router
Before you try to open the router admin page, make sure your device is connected to the router you want to manage.
On a computer, you can connect using Wi-Fi or an Ethernet cable. If you are using Wi-Fi, click the network icon on your Windows taskbar and select your router’s wireless network. Enter the Wi-Fi password if Windows asks for it.
If you are using an Ethernet connection, connect one end of the Ethernet cable to your computer and the other end to one of the router’s LAN ports.
If you are using a phone or tablet, connect it to the router’s Wi-Fi network through the device’s Wi-Fi settings.
This step is important because the router’s administration page is normally available only to devices connected to that local network.
You do not necessarily need an active internet connection for this step. Even if websites are not loading, you may still be able to access the router’s local administration page.
Step 2: Open a Web Browser
Once your device is connected to the router, open a web browser.
You can use Google Chrome, Microsoft Edge, Mozilla Firefox, Safari, or another modern browser.
You do not need to search Google or another search engine for the router’s login page. Instead, you will enter the router’s IP address directly into the browser’s address bar.
For example, if your router uses 192.168.1.1, you would enter:
192.168.1.1
Make sure you enter the address into the address bar at the top of the browser window, not into the search box on a webpage.
Step 3: Try the Common Router IP Addresses
If you already know your router’s IP address, type it into the browser’s address bar and press Enter.
If you do not know it, you can try some of the most commonly used router addresses.
Start with 192.168.1.1.
If that does not open the login page, try 192.168.0.1.
You can also try 192.168.1.254 or 10.0.0.1, depending on your router and network configuration.
If one of these addresses opens a router login screen, you have found the correct address.
However, do not assume that every router uses one of these addresses. Your router may have a different local IP address. If none of the common addresses work, move to the next step and find the exact address from your device.
Step 4: Find the Router IP Address in Windows
Windows can show you the router’s IP address if you do not know it.
On Windows 11 or Windows 10, press Windows + R on your keyboard. The Run dialog box will appear.
Type cmd and press Enter.
A Command Prompt window will open. Type the following command:
ipconfig
Press Enter.
Windows will display information about your network connections. Look for the connection you are currently using, such as Wireless LAN adapter Wi-Fi or Ethernet adapter Ethernet.
Find the entry called Default Gateway.
The number shown next to Default Gateway is usually the local IP address of your router.
For example, you might see:
Default Gateway . . . . . : 192.168.1.1
In this example, 192.168.1.1 is the address you should enter into your browser.
Do not worry if the number on your computer is different. Different routers and networks can use different addresses.
Step 5: Enter the Router Address in the Browser
After finding the Default Gateway, return to your browser.
Click the address bar and enter the exact number shown next to Default Gateway.
For example, if Windows shows 192.168.0.1, enter:
192.168.0.1
Then press Enter.
Your browser should attempt to connect to the router’s local administration interface.
You may see a login screen, a router setup page, or a warning that the connection is not secure. The appearance depends on the router manufacturer and its firmware.
If the page does not load, double-check that you entered the address correctly. Router IP addresses use periods between the numbers, and a small typing mistake can prevent the page from opening.
Step 6: Enter the Router Administrator Username and Password
After reaching the router’s administration page, you will normally see a login screen.
The router may ask for an administrator username and password. These credentials are different from your Wi-Fi password on some routers.
If you recently purchased the router, the administrator login information may be printed on a label attached to the router. It may also be included in the router’s setup documentation.
Some newer routers ask you to create an administrator password during the initial setup instead of providing a universal default password.
If your internet provider supplied the router, the administrator credentials may be included in the setup information provided by the provider.
Enter the requested credentials carefully and select Log In, Sign In, or a similar option.
Avoid repeatedly guessing passwords because some routers may temporarily restrict login attempts after multiple unsuccessful attempts.
Step 7: Locate the Router Settings
After successfully signing in, you should see the router’s administration dashboard.
The layout varies considerably between manufacturers. You might see sections such as Wireless, Wi-Fi, Network, Internet, Security, Parental Controls, Connected Devices, Administration, or Advanced Settings.
Take a moment to become familiar with the interface before changing anything.
If you only want to change your Wi-Fi name or password, look for the Wireless or Wi-Fi section.
If you want to see which devices are connected to your network, look for Connected Devices, Device List, or a similarly named section.
If you are troubleshooting an internet problem, the Internet, Status, or Network section may contain useful connection information.
Step 8: Make Changes Carefully
Once you have accessed the router admin page, you can change various settings. However, it is important to make changes carefully because incorrect network settings can affect your internet connection.
For example, changing the Wi-Fi password will disconnect devices that are currently using the old password. Changing advanced network settings without knowing what they do can also cause connectivity problems.
Before changing an important setting, check whether the router provides a Save, Apply, or Confirm button.
Some routers restart automatically after certain changes. If that happens, wait for the router to finish restarting before attempting to reconnect your devices.
If you are changing several settings, consider changing one setting at a time. This makes it easier to identify which setting caused a problem if something stops working.
Step 9: Sign Out When You Are Finished
When you have finished managing the router, look for a Logout or Sign Out option in the administration interface.
This is particularly important if you accessed the router from a shared computer.
After signing out, close the browser window if you no longer need it.
You generally do not need to leave the router admin page open. The settings you saved should remain active on the router even after you close the browser.
FAQs
What is a router admin page?
A router admin page is a local web-based control panel used to manage the router. It can provide options for Wi-Fi settings, security, connected devices, network configuration, firmware updates, and other router features.
What is the most common router login address?
Common router addresses include 192.168.1.1 and 192.168.0.1. However, the correct address depends on your router and network configuration. On Windows, checking the Default Gateway is a reliable way to identify it.
Can I access the router admin page without internet?
Yes. You normally only need to be connected to the router’s local network. Your internet service can be temporarily unavailable while the router’s local administration page remains accessible.
Why does 192.168.1.1 not work?
Your router may use a different IP address. Check ipconfig in Windows and look for Default Gateway. Enter that address into your browser instead.
Also make sure your device is connected to the correct router and that you are entering the IP address into the browser’s address bar.
Is the router admin password the same as the Wi-Fi password?
Not necessarily. Some routers use separate credentials for the administrator account and the wireless network. Check your router’s label, setup documentation, or the password you created during initial configuration.
Can I access the router admin page from my phone?
Yes. Connect your phone to the router’s Wi-Fi network, open a browser, and enter the router’s local IP address. You can then sign in if the router supports mobile browser access.
What should I do if I forgot my router admin password?
First, check the router documentation or the information supplied by your internet provider. If you previously changed the administrator password and cannot recover it, the router may provide a password recovery option.
As a last resort, some routers have a Reset button that restores factory settings. Be careful with this option because resetting the router can erase your existing configuration and require you to set up the network again.
Is it safe to change settings on the router admin page?
Yes, provided you understand the setting you are changing. Basic changes such as updating the Wi-Fi password are generally straightforward, while advanced settings can affect your network configuration. When changing important settings, record the previous value first so you know what to restore if necessary.
Summary
Accessing your router admin page is usually a simple process. First, connect your computer or phone to the router. Then open a web browser and enter the router’s local IP address, such as 192.168.1.1 or 192.168.0.1.
If you do not know the correct address, Windows can help you find it. Open Command Prompt, run ipconfig, and look for Default Gateway. Enter that address into your browser and sign in using your router’s administrator credentials.
Once inside the dashboard, you can manage settings such as Wi-Fi, security, connected devices, network configuration, and other router features.
Because some settings can affect your entire network, make changes carefully and save only the options you understand.