
Set Up a TP-Link Wi-Fi Extender to Wi-Fi [Guide]
A TP-Link Wi-Fi Extender can help improve wireless coverage in areas where your main router’s Wi-Fi signal is weak. If your bedroom, upstairs room, garage, home office, or another part of your home has a poor connection, an extender can receive the existing Wi-Fi signal and rebroadcast it to provide better coverage.
Setting up a TP-Link extender is usually straightforward, but the process can be confusing if you are doing it for the first time. You need to place the extender correctly, connect to it, select your existing Wi-Fi network, enter the correct password, and then move the extender to a suitable location.
TP-Link offers several setup methods. Depending on your model, you may be able to use the WPS button, a web-based setup page, or the TP-Link Tether app. The available options can vary by extender model.
In this guide, you will learn how to set up a TP-Link Wi-Fi Extender step by step, how to choose the right location, how to connect it to your router, and what to do if the extender does not work as expected.
Let’s go in-depth!
Set Up a TP-Link Wi-Fi Extender [Complete Guide]
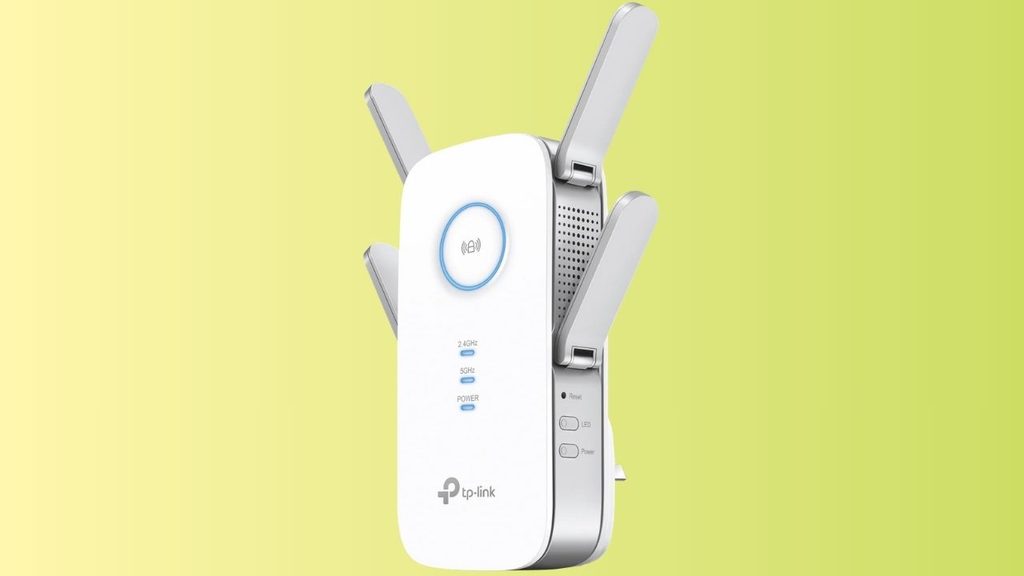
Before starting the setup, make sure you have your main Wi-Fi router, its wireless password, and the TP-Link extender available.
It is also a good idea to keep the extender relatively close to the router during the initial setup.
Step 1: Choose the Right Location for Your TP-Link Extender
The first step is to choose a suitable location for the extender.
During setup, place the TP-Link Wi-Fi Extender close to your main router. This helps ensure that the extender receives a strong wireless signal while you configure it.
Do not immediately place the extender in the room where the Wi-Fi signal is weakest. An extender cannot create a strong connection if it receives an extremely weak signal from the router.
After completing the setup, you can move the extender to a location roughly between the router and the area where you need better coverage.
A good location is usually an open area where the extender can receive a reasonably strong signal from the router. Avoid placing it behind large appliances, inside cabinets, or directly next to objects that could interfere with the wireless signal.
Step 2: Plug In the TP-Link Extender
Connect the extender to a power outlet near your router.
Wait for the power LED to turn on. Depending on your TP-Link model, the indicator lights may look different.
Give the device some time to start completely before continuing.
If the extender has been used previously, it may still contain old network settings. In that situation, resetting the device before starting a new setup can prevent configuration problems.
Step 3: Reset the Extender if Necessary
If your TP-Link extender is brand new, you can normally proceed without resetting it.
If it was previously connected to another router or network, consider performing a factory reset.
Locate the Reset button or reset opening on the extender. The exact procedure varies by model. On many models, you need to press and hold the Reset button for several seconds using a suitable object.
Wait for the extender to restart.
Do not unplug the device while it is resetting.
Once the reset is complete, you can begin the setup process from the beginning.
Step 4: Connect to the Extender
There are several ways to configure a TP-Link extender. The most common methods involve WPS, the TP-Link Tether app, or a web browser.
For a beginner, WPS can be the easiest option if both your router and extender support it.
If your devices do not support WPS or you want more control over the configuration, use the web setup method or Tether app.
Step 5: Set Up the Extender Using WPS
The WPS method allows compatible devices to connect without manually entering the Wi-Fi password.
First, locate the WPS button on your main router.
Press the WPS button on the router.
Within the appropriate time window, press the WPS button on the TP-Link extender.
The extender will attempt to establish a connection with the router.
Watch the extender’s indicator lights. A successful connection is generally indicated by a change in the Wi-Fi or signal LED, although the exact LED behavior depends on the model.
Some TP-Link extenders support connecting to both 2.4 GHz and 5 GHz networks through WPS. Others may behave differently depending on the router and extender.
If WPS does not work, do not assume that the extender is defective. You can use the web-based setup method instead.
Step 6: Set Up the Extender Through a Web Browser
If you prefer manual configuration, connect your computer or phone to the extender’s temporary Wi-Fi network.
The network name may be similar to a TP-Link extender network, although the exact name depends on your model.
Open a web browser and enter the setup address provided for your TP-Link model. Many TP-Link extenders use a TP-Link setup address such as tplinkrepeater.net, but you should follow the address printed in your extender’s documentation if it differs.
The setup page should appear.
You may be asked to create or enter an administrator password. This password controls access to the extender’s configuration interface and may be different from your normal Wi-Fi password.
Step 7: Select Your Existing Wi-Fi Network
The setup wizard will normally scan for nearby wireless networks.
Wait while it searches for available networks.
You should see the Wi-Fi network broadcast by your main router. Select the network you want the extender to use.
If your router has separate 2.4 GHz and 5 GHz Wi-Fi networks, you may see both.
Select the appropriate network and continue.
Make sure you choose your own network rather than a neighboring Wi-Fi network.
Step 8: Enter Your Wi-Fi Password
Enter the Wi-Fi password for the network you selected.
Be careful when entering the password because Wi-Fi passwords are case-sensitive.
If the password is incorrect, the extender will not be able to connect to the router.
If you are unsure about the password, check the router’s Wi-Fi settings or the label provided with the router if the default credentials are still being used.
Continue through the setup wizard after entering the password.
Step 9: Configure the Extended Wi-Fi Network
The extender may allow you to choose how the extended network is named.
Depending on your TP-Link model, you may be able to use a network name related to your original Wi-Fi network or configure a separate name.
Using a recognizable extended network name can make it easier to identify the extender’s signal.
Some newer TP-Link systems may provide additional features that make the extended network experience more seamless.
Follow the on-screen instructions and complete the configuration.
Step 10: Save the Configuration
Review the settings before finishing.
Make sure the selected Wi-Fi network, password, and extended network details are correct.
Select Save, Finish, or the equivalent option shown by your TP-Link setup wizard.
The extender may restart.
This can take a few minutes. Do not unplug the extender while it is applying the new configuration.
Step 11: Move the Extender to a Better Location
Once the setup is complete, unplug the extender and move it to a location between your router and the area with weak Wi-Fi.
Do not place it too far away from the router.
The extender needs to receive a usable signal before it can rebroadcast that connection effectively.
Many TP-Link extenders have a signal indicator that helps you determine whether the selected location is suitable.
If the indicator shows a strong or acceptable connection, the location may be appropriate.
If it indicates a weak connection, move the extender closer to the router.
Step 12: Connect Your Devices to the Extended Network
Now connect your phone, laptop, smart TV, gaming console, or other wireless devices to the extended Wi-Fi network.
Open the device’s Wi-Fi settings and select the network being provided by the extender.
Enter the required Wi-Fi password.
Once connected, test the connection by opening a website or using an online service.
Step 13: Test the Wi-Fi Speed and Stability
After connecting your devices, test the connection in the area where you previously experienced weak Wi-Fi.
You should notice better wireless coverage if the extender is positioned correctly.
Remember that an extender does not necessarily provide the same speed as connecting directly to the router. The actual performance depends on factors such as the distance between the router and extender, wireless interference, the extender model, router capabilities, and the number of connected devices.
If performance is poor, try moving the extender closer to the router.
FAQs
Why is my TP-Link Wi-Fi Extender not connecting to my router?
The most common causes include an incorrect Wi-Fi password, excessive distance from the router, incorrect setup, or compatibility issues.
Move the extender closer to the router and try the setup again. If it was previously configured with another network, perform a factory reset before restarting the setup.
Can I set up a TP-Link extender without WPS?
Yes. You can generally configure compatible TP-Link extenders through a web browser or the TP-Link Tether app.
The exact setup options depend on your model.
How far should a TP-Link extender be from the router?
There is no single distance that works for every home. The extender should be close enough to receive a strong and stable signal from the router while still being close enough to the area that needs improved coverage.
Use the extender’s signal indicator as a practical guide.
Should the extender be placed in the room with weak Wi-Fi?
Usually, you should not place it at the very edge of the router’s coverage.
Instead, position it somewhere between the router and the weak-signal area. This gives the extender a better chance of receiving a usable signal and rebroadcasting it.
Does a Wi-Fi extender make my internet faster?
A Wi-Fi extender primarily improves coverage, not the internet speed provided by your internet service.
In some situations, your connection may feel faster because your device receives a stronger wireless signal. However, an extender can also reduce available wireless throughput depending on its design and connection conditions.
Can I use a TP-Link extender with a different brand of router?
In many cases, yes. TP-Link Wi-Fi extenders can generally work with compatible wireless routers from other manufacturers.
The exact compatibility depends on the wireless standards and features supported by both devices.
Why does my TP-Link extender show a weak signal?
A weak signal usually means the extender is too far from the router or there is significant interference between the two devices.
Move the extender closer to the router and check the signal indicator again.
Do I need to change my router settings?
Usually, no. Most standard extender setups can be completed without changing advanced router settings.
If your router uses special security, access-control, or network settings, additional configuration may sometimes be required.
Can I use multiple TP-Link Wi-Fi extenders?
Depending on your network design and TP-Link model, you may be able to use multiple extenders. However, adding too many wireless repeaters can increase complexity and may affect performance.
If you need coverage throughout a large home, a mesh Wi-Fi system may be a better solution than repeatedly adding extenders.
Summary
Setting up a TP-Link Wi-Fi Extender is generally a simple process once you understand the basic steps. Start by placing the extender close to your router, power it on, and choose a setup method that your model supports.
You can use WPS for a quick setup, or configure the extender through a web browser or the TP-Link Tether app. During manual setup, select your existing Wi-Fi network, enter its password, configure the extended network, and save the settings.
After the setup is complete, move the extender to a suitable location between the router and the area with poor coverage. Use the extender’s signal indicator to help determine whether the new location provides a strong enough connection.
If the connection is unreliable, move the extender closer to the router and test again.