
You Require Permission From the System to Make Changes to This Folder [Windows 11/10]
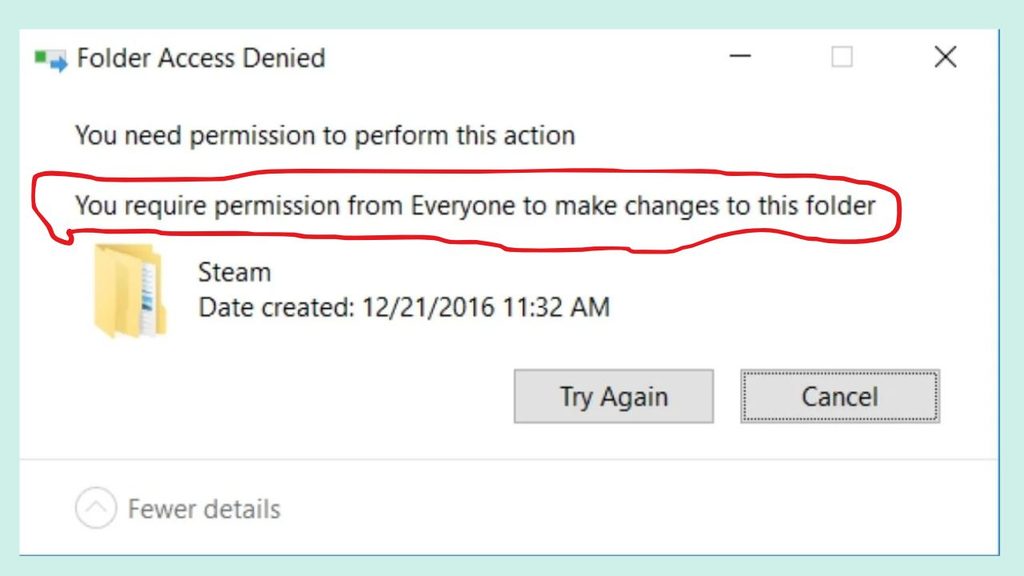
Have you ever tried to delete, rename, move, or modify a folder in Windows, only to receive an error saying, “You require permission from the system to make changes to this folder”? It can be frustrating, especially when you are trying to manage files on your own computer.
This error usually appears when Windows does not give your current user account enough permission to make changes to a particular folder. It can also happen when a folder is owned by the SYSTEM account, another user, or the TrustedInstaller service.
Windows uses these security permissions to protect important system files and prevent unauthorized changes. However, sometimes the same protection can stop you from managing folders that you actually need to access.
In this guide, I’ll explain what causes this error and walk you through several ways to fix it in Windows 11 and Windows 10.
You Require Permission From System to Make Changes to This Folder [Meaning]
The “You require permission from the system to make changes to this folder” error means that your Windows user account does not have the required security permissions to perform the action.
For example, suppose you downloaded a folder, copied it from another computer, or tried to remove an old application folder. When you attempt to delete or rename it, Windows displays a permission message.
This happens because the folder may be owned by SYSTEM, TrustedInstaller, or another user account. Even if you are signed in as an administrator, Windows may still prevent you from modifying it.
Here are some common reasons why this error appears.
Incorrect folder ownership: The folder belongs to another user or system account, so Windows does not allow your account to make changes.
Insufficient permissions: Your account may have read-only access instead of full control.
Protected Windows folders: Some folders contain important operating system files and are protected against accidental changes.
Corrupted file permissions: Windows may have incorrect or damaged security settings for the folder.
External drive restrictions: Files copied from another computer or external storage device may retain their original security permissions.
How to Fix: You Require Permission From the System to Make Changes to This Folder
To fix the “You require permission from the system to make changes to this folder” error in Windows 11 or Windows 10, right-click the affected folder, select Properties, open the Security tab, and click Advanced. Change the folder’s ownership to your administrator account, apply the changes, and grant your account Full Control if necessary. Restart File Explorer and try modifying the folder again.
If changing ownership does not solve the problem, try the following methods.
Step 1: Sign In Using an Administrator Account
Before changing folder permissions, make sure you are using an administrator account. A standard Windows account may not have enough privileges to modify protected files and folders.
An administrator account gives you additional control over Windows settings, applications, and file permissions.
To check your account type, open the Settings application by pressing Windows + I on your keyboard.
Next, select Accounts from the left sidebar. Depending on your Windows version, open Your info or Other users to review the account details.
Look for the Administrator label associated with your account.
If your account is listed as a standard user, sign in using an administrator account or ask the computer’s administrator to make the necessary changes.
Once you have confirmed that you are using an administrator account, try accessing the folder again.
If the error continues, move to the next method.
Step 2: Take Ownership of the Folder
One of the most effective ways to fix this error is to change the folder’s ownership.
When Windows assigns ownership to SYSTEM or another account, your user account might not have permission to modify the folder. Changing ownership allows you to manage its security permissions.
Here’s how to do it.
First, locate the folder that is showing the permission error.
Right-click the folder and select Properties.
Open the Security tab and click the Advanced button near the bottom.
At the top of the Advanced Security Settings window, find the Owner section.
Click Change next to the current owner’s name.
A new window called Select User or Group will appear. Enter your Windows account name in the available box.
Click Check Names to verify the account. If Windows recognizes it, the account name will be displayed in the correct format.
Click OK to continue.
Now, enable Replace owner on subcontainers and objects if you also need to change ownership of the files and folders inside the selected folder.
Click Apply, followed by OK.
Windows may take a few moments to update the ownership information, especially if the folder contains many files.
After completing the process, reopen the folder’s properties and check whether you can now modify it.
Important: Avoid taking ownership of Windows system folders, such as Windows, System32, or protected application components, unless you have a specific reason and understand the consequences. Changing their ownership can interfere with Windows updates and system security.
Step 3: Give Your User Account Full Control
Changing ownership does not always automatically grant your account permission to perform every action.
For this reason, you should also check the folder’s security permissions.
Right-click the affected folder and select Properties.
Navigate to the Security tab and click Edit.
Under the Group or user names section, select your Windows user account.
Look at the permissions listed below.
Find the Full control option and check the Allow box.
If your account is not listed, click Add and enter your Windows username. Select Check Names, click OK, and then select the account.
Now, enable Full control under Allow.
Click Apply and then OK to save the changes.
Try renaming, deleting, or modifying the folder again.
If Windows still displays the same message, continue with the next method.
Step 4: Disable Inherited Permissions and Check Access
Sometimes a folder receives its security permissions from its parent folder. This feature is called permission inheritance.
If the parent folder has restrictive permissions, the same restrictions can affect the folders and files inside it.
To check this setting, right-click the affected folder and select Properties.
Open Security, click Advanced, and look for the inheritance option.
If you see Disable inheritance, inheritance is currently enabled.
Clicking it will provide options to convert inherited permissions into explicit permissions or remove inherited permissions.
For most users, converting inherited permissions is the safer choice when you need to manage the existing access rules.
Review the permission entries carefully before making changes. Do not remove entries for SYSTEM or TrustedInstaller from protected Windows locations.
Click Apply after making the necessary adjustments.
This method is particularly useful when permissions inherited from another folder are preventing you from accessing your files.
Step 5: Restart File Explorer
Sometimes Windows File Explorer continues displaying an old permission state even after you have changed the folder’s security settings.
Restarting File Explorer can help refresh the Windows interface.
Press Ctrl + Shift + Esc to open Task Manager.
Look for Windows Explorer under the Processes tab.
Right-click it and select Restart.
Your taskbar and desktop may disappear briefly. Don’t worry, as this is normal.
Windows will automatically restart File Explorer.
Once it returns, navigate to the affected folder and try making the changes again.
If this does not work, continue to the next solution.
Step 6: Use Command Prompt to Change Folder Permissions
If the graphical permission settings are not working, you can use Command Prompt to change ownership and permissions.
This method is useful for users who are comfortable entering Windows commands.
First, open the Start menu and search for Command Prompt.
Right-click the application and select Run as administrator.
To take ownership of a folder and its contents, enter the following command:
takeown /F “C:\Path\To\Folder” /R /D Y
Replace C:\Path\To\Folder with the actual location of your affected folder.
Next, grant full control to your administrator group:
icacls “C:\Path\To\Folder” /grant Administrators:F /T
Press Enter after entering each command.
The first command changes ownership, while the second grants full control to the Administrators group.
Wait until Windows completes the operation.
Important: These commands modify permissions recursively. Use them only on folders you own or are authorized to manage. Avoid applying them to Windows system directories or application folders because doing so may damage their security configuration.
Step 7: Check Whether the Folder Is Being Used by Another Program
Another reason Windows may prevent you from modifying a folder is that a running application is using one or more files inside it.
For example, an antivirus application, file synchronization program, or background process may be accessing the folder.
Close any applications that might be using the files.
You can also open Task Manager using Ctrl + Shift + Esc and check for unnecessary background applications.
Close only applications you recognize and know are safe to exit.
After closing them, try renaming or deleting the folder again.
If the folder is still locked, restarting your computer may help release the files.
Step 8: Restart Your Computer
If none of the previous solutions work, restart Windows.
A restart closes background processes, refreshes system services, and releases many temporary file locks.
Open the Start menu, click the Power icon, and select Restart.
After your computer starts again, sign in using your administrator account.
Navigate to the affected folder and check whether you can make changes.
If the problem continues, review the folder’s ownership and permissions again rather than repeatedly changing unrelated Windows security settings.
FAQs
1. Why does Windows say I need permission from SYSTEM to delete a folder?
This message usually appears because the folder is owned by the SYSTEM account or another protected Windows account. Your current user account does not have sufficient permission to delete or modify it.
2. How do I get permission to delete a folder in Windows 11?
Right-click the folder, select Properties, open the Security tab, and click Advanced. Check the current owner and change it to your administrator account if appropriate. Then review the permissions and grant your account the required access.
3. Does changing folder ownership delete my files?
No. Changing ownership does not normally delete the files inside a folder. However, it changes who controls the folder’s security permissions. Always back up important files before modifying permissions.
4. Why can’t I delete a folder even though I am an administrator?
Being an administrator does not automatically give you unrestricted access to every Windows folder. Some folders are protected by SYSTEM or TrustedInstaller to prevent unauthorized modifications.
5. Is it safe to take ownership of a Windows folder?
Not always. Taking ownership of protected Windows folders can interfere with system updates, application functionality, and security settings. Only change ownership when necessary, and avoid modifying critical system directories.
6. Can Command Prompt fix the system permission error?
Yes. Commands such as takeown and icacls can change folder ownership and permissions. However, you should use them carefully because incorrect permission changes can affect Windows security.
Summary
The “You require permission from the system to make changes to this folder” error usually occurs because your Windows account does not have sufficient access to a particular folder.
In most cases, checking the folder’s ownership and granting the appropriate security permissions will resolve the problem.
Start by signing in with an administrator account, then try changing ownership and granting Full Control.
If the issue continues, restart File Explorer, check inherited permissions, or use Command Prompt to make the necessary changes.